If I have my Fly Tying Bible on my fly tying table in my office, do I need to genuflect every time I pass it on my way into or out of my office?

If I have my Fly Tying Bible on my fly tying table in my office, do I need to genuflect every time I pass it on my way into or out of my office?
So far we have tied a series of streamer style flys, imitating aquatic life that resides below the surface, and a number of dry fly patterns, fished on the surface. They all have the potential to catch numerous species of fish in Canada. Today’s fly, the Egg fly, is the 7th and the last in our series. I didn’t actually see myself using this fly this year so I put it last on the list and then I cheated. I also wasn’t planning on cheating but while at the dollar store looking for some gag gift items, I saw bright colored Neon Poms and it became clear, time to cheat.


The actual pattern recipe calls for using Egg Yarn, tie it on and trim into the shape of a ball. That’s it, but I took one more step on the easy path, buying pre-made puff balls. At first I tried the larger size puff balls but they were just too big and too cumbersome so I switched to the smaller size.

The article in Outdoor Canada showed yellow balls. I used both yellow and pinkish red color.
Difficulty Level: 1 out of 5. If you follow the actual instructions and use egg yard, the difficulty level will go up to 1.1.
Materials:
After you pinch off all the hook barbs, place the hook in the vice. Starting just behind the eye, build up wraps of thread larger than the diameter of the eye. This will help keep the puff ball from sliding forward and off the hook. Now remove the hook from the vice and slide on two of the colored puff balls side by side. Pass the tying thread around one puff ball and add approximately 10 wraps between the balls.
 Pass the thread behind the second puff ball and build up the wraps of thread to prevent the puff ball from sliding back.

Pass the thread to the middle again, add a couple wraps, pass to the eye of the hook and wind on 2 or three additional wraps then whip finish the thread. i then add head cement to both the head thread wraps as well as those behind the second ball. I use more cement than on a normal fly to get some adhesion between the thread and the puff ball to further prevent slipping.


In the flybox, now you can you can see a full compliment of the 7 Flies That Catch Fish in Canada. Some are a bit tattered, having been in the battle, and some have yet to see action, or have yet to fool a fish. 
At the very beginning of summer, literally, I did a fly-in trip to Dead Lake in northern Saskatchewan. The float plane dropped us off at the dock about 10 PM on the evening of June 20th. I had never been to this lake before so when in doubt I brought whatever gear I thought i carry. The other 4 member of the fishing party had been here before so i knew from their stories that there were definitely fish to be caught.  The evening was a true northern Saskatchewan experience. We started a campfire and decided to “sip” some rum and whiskey until it got dark. Between refills, I walked down to the dock and tossed an old time favorite spoon into the water, the Len Thompson 5 of Diamonds. 6 pike later and I knew I had my morning plan. I eased off the rum mixture knowing I was going to have an early start. Also, knowing how far north we were, staying up until it got dark doesn’t really happen, as you can see from the midnight picture below.

So about 2 AM I went for a nap while others promised to take up the slack on the rum for me. It was a quick but necessary few hours of sleep. When the sun was up a bright, and the lake was like glass that next morning, it was time to pull out the fly rod and test some of the patterns I had tied the past spring, tied in anticipation of morning just like this.

So out came the 8 weight fly rod and the box of streamers. I pushed out one of the 6 aluminum fishing boats and paddled out about 100 feet from shore. The previous evening I had hooked 3 or 4 pike in the same spot from the dock and now I was in position to cast back to that spot, from the other side of it. The Clouser Minnow was the first fly of choice. i had tied some variations including some with longer streamers with pike in mind. It was about cast #5 or #6 when I saw a wake headed towards my fly followed by an aggressive splash. Pike on the fly! This became my morning routine for the rest of the trip.

Throughout the mornings I continued to switch out flies, alternating between Clouser Minnows, Bucktails (aka Mickey Finns), and Wooley Buggers. While all three of these fly patterns did catch pike, the Clouser Minnow was the clear winner. In fact the red and white Clouser Minnow, shown below, was by far the best fly of the trip. The bucktails were the #2 fly and the both the pure black Wooley Bugger and read headed Wooley Bugger intended to look like an egg sucking leach caught a few fish.

I often like to experiment when fishing, after catching a few fish on one fly, I will change to another to see if it will produce fish as well as the other. But, this trip, I had time switching away from the red and white Clouser Minnow. When you are catching a pike on a fly rod with great regularity, why swap your fly? What I did experiment somewhat with was the color of the fly. Other combinations included a blue and white, a green and white, and the second best colour combination green, red and white.
The great fun of fishing for pike in shallow water with a fly is that often you can see the streak of the fish as it accelerates towards and attacks your fly. These aggressive fish always give you a head-shaking fight when hooked as they try to dislodge the fly.
 What I did not get the thrill of catching on a fly rod was a net filling pike like the one below. This one, and many other 36″ and larger pike were caught with spinning gear on jig heads, spoons and walley divers. i did pull in a 30+ inch pike on a fly rod, on a solo morning float just out in front of the cabins but nothing to compare to the 15 pounders that were also caught on the trip.

I have some more pike on the fly action planned for late August on a different lake. The Clouser Minnow is definitely going to be the featured fly.
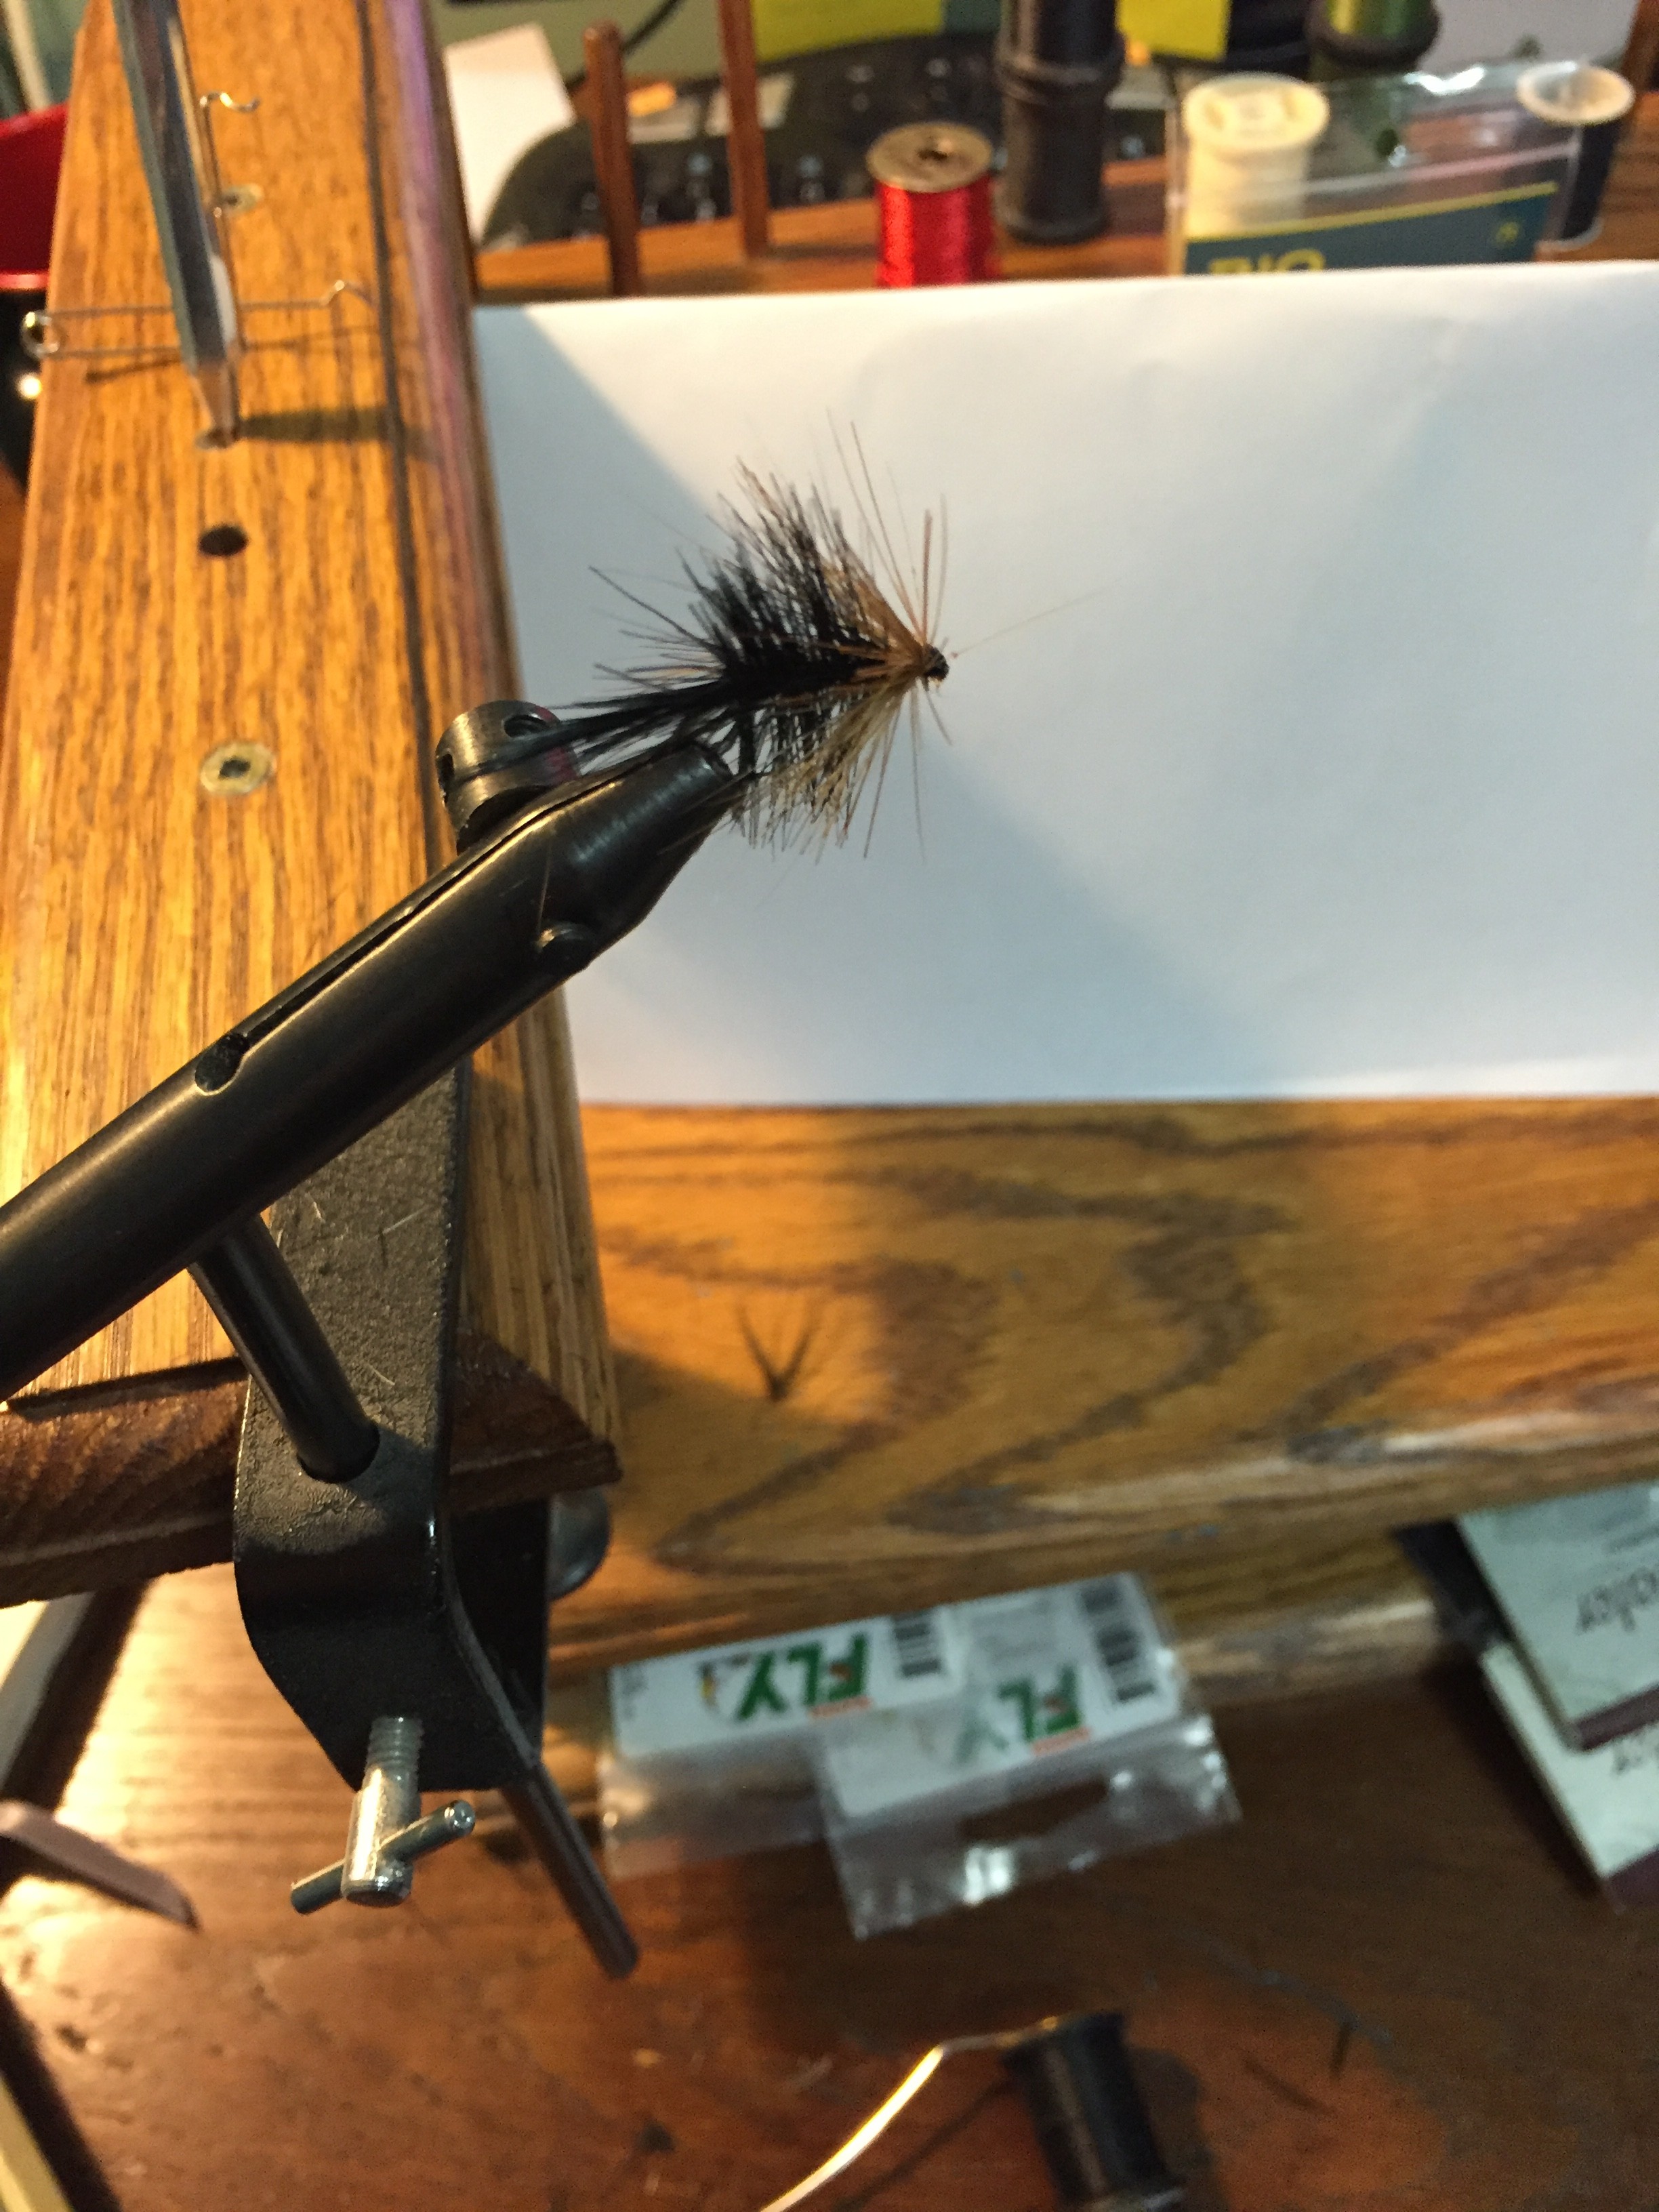
The X-Caddis. Is it better than the traditional and classic Elk Hair Caddis? Now that I have tied a few of both, we are soon to find out. I will say this, the X-Caddis is a few degrees of difficulty easier than the traditional fly pattern. Less materials and easier to finish.
This fly was left to one of the last to tie in the series as most dry flies are summer time flies, as is no exception with the caddis. As June turns into July, success with the caddis fly is prime time.
Difficulty Level: 2 out of 5. The Fly Tying Bible rates the Elk Hair Caddis as a 3 out of 5 for tying difficulty. With a couple fewer materials, this version of the caddis is pretty easy to tie. Probably the trickiest part is tying off after you fasten in the elk hair for the wing. You need to leave a fairly large loop of thread to get over the butt end of the elk hair the protrudes forward over the hook eye.
Materials:
Place the hook in the vise and wind on the thread beginning at the eye and winding in tight turns until opposite the hook point. I prefer caddis flies in size 8 to 12, although some guides recommend down to a size 14 hook.
Catch in some Antron, Z-lon or similar yarn for the tail. I didn’t have any so i substituted a somewhat darker small bunch of the elk hair. I actually like using this darker hair material for this purpose. If you let the hair twist around the shank as you catch it in, the butt ends will dangle forward like legs.
 Roll on some dubbing onto your thread and wind it forward, stopping behind the eye.
 Once you reach the eye, pull off any extra dubbing and wind the thread back to the point opposite the hook point, in widely spaced turns, and then forward again, widely spaced, to hold the dubbing in place. Otherwise the first good fight with a trout will pull off all your dubbing.
 Cut off a stack of elk hair and pinch together. Catch in tightly slightly behind the hook eye, allowing the butt end of the hair fibres to protrude forward just past the hook eye. Wrap the thread tightly 5 0r 6 times, and then tie off, using large loops to fit over the elk hair butt ends. Add some glue and you are finished.
 For those who like the traditional caddis pattern, you can easily add the hackle component. After catching in the tail fibres, use a couple more loops of thread and catch in a hackle feather. Then add your dubbing to the thread and wind on the dubbing body forward. Follow the dubbing with winding the hackle forward.
 Leave the hackle pliers attached and hanging while you attach the elk hair wing. Add 5 or 6 wraps of thread to hold the dubbing, hackle feather, and wing fibres. Then tie everything off and add glue.
 I tied 2 of these X-Caddis flies (the 2 on the left) on a #8 dry fly hook and the other 4 on a #12 hook. The #8 flies look a little large, but trout start slurping up hoppers in August, you can often get them to bite at a big caddis as well.

We are nearly complete with our 6 of our 7 flies for Canada tied.
 Actually, it’s 7 out of the 8. I’ve added the Super Jumbo Mosquito fly to the box, lower right side. If you are fishing still water for trout, especially in the evening / sunset, you will love this fly. So with the dry fly X-Caddis added to the box, we are pretty well set for most fishing situations. Just the Egg Fly left, which is primarily a pattern for streams and rivers.
 Well, the sun is up, the article is finished, the X-Caddis flies are dry, so it’s off to the ‘ole fishin’ hole!
This fly is classic nymph imitation. It can fool a trout into taking it just subsurface in low light or let the fly sink and use it as a bottom runner. First time I fished a fly similar to this, we called it the Trout Pond Slayer. It was little more than a ball of brown hare’s fur, tossed into the pond to imitate the food the pond attendants fed the fish, small pellets. Imitate what they feed on and catch fish.
This is a very straight forward fly to tie, with the exception of properly selecting enough wing material for the wing casing (in one of the variants I tied). I had trouble finding the right materials, at least the webby hen or partridge hackle used for the collar. I tried substituting a few materials with limited success. Finally I moved on to tying this fly as a Hare’s Ear Nymph, complete with wing casing.
Difficulty Level: 3 out of 5. According to the Fly Tying Bible this is a 3 out 5 for tying difficulty. Once you figure out how much feather materials to use of the wing casing, and how to keep it on top of the body, the rest of the fly is really easy. However, in most of the nymphs I tie, I leave out the tinsel.
Materials:
Place the hook in the vice. Starting just behind the eye, build up wraps of thread approximately 1/4 down the shank, catching in the tag end of lead wire. Wind on 4 or 5 wraps of lead wire. The lead wire help make the fly head heavy and creates a bobbing action as you strip in line. Cover with tying thread and continue the tying thread to the hook bend. Catch in some hare’s hair at the hook bend or some other soft animal hair.

Wind on the hare’s fur dubbing by rolling it continuously around the thread then wrap it on, using each successive wrap to hold the loose fur in place. Add a couple of overwaps if needed to hold the body fur in place.

Build the body up thicker near the front of the fly.
As I mentioned, I was not able to get any proper collar material so I experimented with other materials. In the pic below, I tried some of the soft feather material from the base of duck wing feathers. In the water, it might pulse a bit as the fly is pulled. I also used elk hair, which was difficult to hold in place and then attach. If that version of the fly catches more fish, I will certainly have an update. This summer. In this case, I attached the fibres and then built up a head with tying thread.

In this next example, I wound the dubbing forward about 2/3 of the way to the eye, then caught in grey feather fibres with the tag end forward. Then dub on some more hare’s fur and build up a thicker body over the tag end.

Then pull the feather fibres forward and secure with the tying thread, then build a head and tie off, finishing with head glue.

This is a very versatile pattern that seems to work because it just looks buggy. Keep away from the urge to make this too flashy or sophisticated and keep it a little messy.

The bottom of the box now has several fly versions, the dry fly Bivisible and the very adaptable Hare’s Ear Flymph / Nymph.
With Wooley Buggers, Brown and White Bucktails (Mickey Finn), and Clouser Minnows. These are all considered sub-surface patterns, fished as wet flies. They are also fairly large fly patterns. They are used to go down to where the fish are, feeding in the water column or the at bottom.

The selection is now getting to where we can fish most conditions for many species of fish in Western Canada. Just as an aside, the opening day of fishing season in Canada is now passed and I will be adding articles on Fishing Flys for Canada with some results.
So far we have tied a series of streamer style flys, imitating aquatic life that resides below the surface. Today’s fly, the Bivisible, is a dry fly pattern, fished on the surface, the pinnacle of fly fishing dreams, a big trout sipping your fly and then dancing the battle to your net.
This fly consists of a hook, thread and two colors of hackle feathers. A short list, a simple fly, as long as you take a little care. Color variations are easy to accomplish with this fly, but keep the white, or at least the lightest feather color at the eye of the hook.
Difficulty Level: 2 out of 5. According to the Fly Tying Bible this is a 4 out 5 for tying difficulty. That rating is a little baffling. If you get the hang of working the hackle pliers, you can crank these flys out in under 5 minutes each.
Materials:
After you pinch off all the hook barbs, place the hook in the vice. Starting just behind the eye, build up wraps of black thread all the way down the shank to opposite the hook point. Trim off and wrap in the hackle feather tip for the tail.


Select a dark hackle feather with the fibre length about twice that of the hook gap. Catch it in at the tail of the hook. Wind your tying thread 2/3 of the way back up the shaft towards the eye. Use your hackle pliers and wind the hackle to the thread in tight turns.

At the thread, tie off the dark hackle and catch in the butt of the light hackle feather. Wind your tying thread to the eye. Wrap the hackle using your pliers to the eye and use the tying thread to catch in the end of the light hackle feather.
Build up a head with more turns. Cast off and add head cement.

In the flybox, you can see a few color variations. Black main feather with tan color hackle feather. Black with white, and tan with white. In the bright light of a summer day, the black / tan will show much more contrast than the pictures suggest.

It’s just about mid-April, which means less than a month away from opening day of fishing season in Southern Saskatchewan. For me, early season means chasing hungry pike in the shallows. Outdoor Canada recently had an article on the topic. You read their 3 Unbeatable Rigs for Catching Huge Early Season Northern Pike.
i am especially drawn to the third heading in the article, the Fly Fishing Formula. I have a few streamers that are well liked by pike. But, I have my own summer fishing plan that was inspired by a different Outdoor Canada article so before I go into my fly box and tie on some of the big streamers, I first have to work the water with some of the Seven Flies that I have tied for this season. Maybe a variation of the Clouser Deep Minnow will work for early season pike. In my article, I tied all the flies with blue and white bucktail. Now I am going to go back and tie some other colour combinations, and add some length, to try and match the look of the whitefish spoons and cisco baits used by many anglers. Combinations of white, silver, and gold might look very whitefishy. Some mixed green colors, with yellow, white, and a flash of red can pass as perch soon to be a meal.
More to follow, as i tie some patterns, and more in a month as they hit the water.
This fly is a deep running minnow imitation. First time I fished a Clouser Deep Minnow was in a sheltered bay on Lake Diefenbaker, near Saskatchewan Landing. It turned out to be a popular fly with the Goldeyes in the area. I had good success with it a few years later at Besnard Lake, casting it past a Walleye pool then letting it swing down into the pool and pulling it through. The barbel eyes make it sink quickly and the upturned hook help avoid bottom snags.
This is a very straight forward fly to tie. If you can wind thread around a hook shank, you can tie this fly. For variation, just substitute colors of bucktail to produce different colored minnow patterns. Even tri-colored versions work, especially a green, blue, white combination. Because there are two bunches of material used, one for the body/tail and one for the wing, you can even add a little bit of red to the body, such as red and blue, and then white and blue for the wing.
Difficulty Level: 1 out of 5. According to the Fly Tying Bible this is a 3 out 5 for tying difficulty. Once you figure out how to attach the dumbbell eyes, the rest of the fly is really easy.
Materials:
Place the hook in the vice. Starting just behind the eye, build up wraps of white thread approximately 1/4 down the shank.

Attach the dumbbell eyes to the top of the shank using figure 8 turns of thread. Leave some space between the eyes and the hook eye. You will use this space to attach the wing material. Use enough turns to keep the eyes firmly in place. Cut small bunches of blue bucktail and white bucktail and place them together. The bucktail should be about 2 times the hook shaft length, or longer. Trim the end to make it even and place on the shaft behind the dumbbell eyes. Secure in place by winding the thread in wide spaced turns to the hook bend and back, which will create a criss-crossed pattern of white thread.

Remove the hook from the vice, flip it over and re-insert into the vice. This places the heavy eyes at the bottom of the hook and keep the hook bend facing up when fishing to minimize bottom snags.

Gather a mixed bunch of white and blue bucktail, longer than the body/tail bunches, about 2-1/2 to 3 times the hook shaft length. Catch them in between the hook eye and the dumbbell eyes. Use enough wraps of thread to build up a head then move the thread behind the dumbbell eye and add another 8 to 10 wraps of thread. Whip finish the thread here and add head cement to the wraps in front of and behind the dumbbells.

If your dumbbell eyes did not come pre-painted, you can choose to paint them or leave them. If you wish to paint them, to add more realism, you can use a dab of whiteout, let it dry, then use a black sharpie permanent marker. Small bottles of craft paint work as well, with a very small brush. Just be careful you only pain the eyes. You can paint them before you tie them to a fly, but because they are small items, it can be difficult.

With Wooley Buggers, Brown and White Bucktails (Mickey Finn), and Clouser Minnows. These are all considered sub-surface patterns, fished as wet fly. They are also fairly large fly patterns. They are used to go down to where the fish are, feeding in the water column or the at bottom. The next fly we will tie will be a dry fly, the Bivisible.

The bucktail fly is also known as the Mickey Finn. It is intended as a minnow imitation. I have fished this fly successfully for perch. They attack it aggressively with their tap-tap-tap bites. A large size fly, such as a #4 or a #6 is often to big a fly for their small mouths so I like to tie them in #8 sizes as well.
When I dug into my tying supplies, I found myself without the recommended materials for the wing portion of the fly, so, I adapted and used the closest materials I had. In place of brown and white bucktail, I used long elk body hair and some white or red crystal flash. Variations of this fly can easily be made by using other colors for the wing and tag sections.
Difficulty level: 3 out of 5. According to the Fly Tying Bible this is a 3 out 5 for tying difficulty. I agree with them, if only because of the variety of materials this fly uses. a 3 out of 5, should mean that the average fly tier should be able to handle it, while a novice may struggle a bit.
Materials:
Pinch off the barbs on all your hooks then secure the hook end of one in a vise. Start the red tying thread about 1/3 back from the eye and wrap the shaft back to the hook bend. Catch in a small portion of red marabou for the tag.

Cut a section of silver mylar piping about 2/3 the length of the shaft and remove any stuffing from the inside of the piping. Slide the piping down the shaft and just past the red tying thread. Use 5 to 8 wraps of thread to secure the piping in place, whip finish and add some head cement to the red thread.

Wind on the black tying thread at the eye. Push the mylar piping in forward then hold in place. Wind the black thread away from the eye to secure the piping in place.


Mix together two small bunches of brown and white bucktail and stack one end together. Place on the shank near the eye and secure in place with several wraps of black thread. Trim away any excess bucktail reaching past the eye. Wind on black thread to form a head, whip finish and add head cement to complete.

Options: You can add weight to the fly with lead wire, either by pre-wrapping the shaft or by attaching the wire at the same time as the piping at the hook bend, then wrapping the wire forward over the piping and securing with the black thread near the eye. You can also trade the marabou tag for a thread tag made with multiple wraps of built up thread.

When tying a shorter shaft fly, the mylar piping can be difficult to work with in such short lengths. Substitute some silver tinsel, using overlapping wraps from the hook bend to the black thread just behind the eye.


Difficulty Level: 2 out of 5.
All of the steps are pretty basic, but if you decide to add your own enhancements and options it becomes a little more challenging. The most difficult step is winding the hackle, but get yourself some good hackle pliers and it will be an easy job. According to the Fly Tying Bible (you need this book if you are even thinking of ever tying a fly) this is a 3 out 5 for tying difficulty.
Materials:
Start by pinching down the barb on the hook with a set of pliers.

Slide the bead head over the hook and forward to the eye of the hook
(Optional) Wind the Lead Wire from the bend of the hook forward to the eye.

Wrap the thread approximately 5 times just behind the lead wire at the hook bend and catch in a bunch of marabou, stem of the hackle, and the Chenille. Continue winding the thread forward to the eye, which also serves to secure the lead wire in place.

Wrap the chenille forward to just short of the bead head and catch in place with several wraps of thread.

Wind the hackle forward and catch in place with thread behind the bead head. Tie off the thread and add head cement to finish the fly.

Options: You can create variations of this fly very easily, just by changing the color scheme of the fly, substituting olive for black in any of the material, from all olive to all black, and a mix of colors in between. On an all black version, create an egg-sucking leach by skipping the bead head and using red floss to build up a red, egg shaped portion just behind the hook eye.


