Prairie Outdoors
  • Email
  • Facebook
  • RSS
  • Home
  • Outdoors Blog
  • Campgrounds and Camping
    • Alberta Campgrounds
    • Saskatchewan Campgrounds
    • Manitoba Campgrounds
    • Camping Photo Contest
    • Country Building Photo Contest
    • Boats and Trailers
    • ATV and Snowmobile Rentals
    • Campground Reservations
  • Hunting
    • Wildlife on Camera 2026
    • Hunting Photo Contest
    • Outfitter Guides and Lodges
    • Buy Hunting Licenses
    • The Campfire
    • Our Favorite Places
    • Know Your Species
    • Saskatchewan Whitetail and Mule Deer Seasons
    • Deer Antler Scoring Whitetail and Mule Deer
    • Scoring Your Black Bear Trophy Skull
    • Moose Antler Trophy Scoring
    • Hunting Dogs
  • Fishing
    • Fishing Photo Contest
    • Buy Fishing Licenses
    • Fishing Camps and Lodges
    • The Campfire
    • Our Favorite Places
    • Ice Fishing
    • Pike & Walleye Weight Chart
  • Outfitters
    • SK Deer Hunting
    • SK Moose Hunting
    • SK Bear Hunting
    • SK Goose Hunting
    • Alberta Outfitters and Guides
    • Saskatchewan Outfitters and Guides
    • Manitoba Outfitters and Guides
    • Trip Finder
  • Hunts For Sale
  • Games
    • Outdoor Hangman
    • Outdoor Trivia
    • Outdoors Trivia 2
    • Survey – Broder Buck vs Hanson Buck
    • Survey – Fishing – Keep or Release
    • Survey – Fishing – Lefty or Righty
    • Survey – Shotgun for Geese
    • Survey – Fishing – Pike vs Walleye
    • Survey – Fly Fishing vs Spincasting
    • Survey – Upland Birds vs Waterfowl Hunting
  • Advertise
    • Advertise Your Outfitter Business
    • Advertise Your Campground
    • Outdoors Web Site Development
    • Sponsor Opportunities on Prairie Outdoors
    • Advertise Your RV Dealership
  • About
Search the site...
  • Home
  • Fishing (Page 5)

7 Flies for Canada – #3 – Clouser Deep Minnow

April 3, 2016 / galen / Fishing, Fly Fishing

Fly #3 in the Series

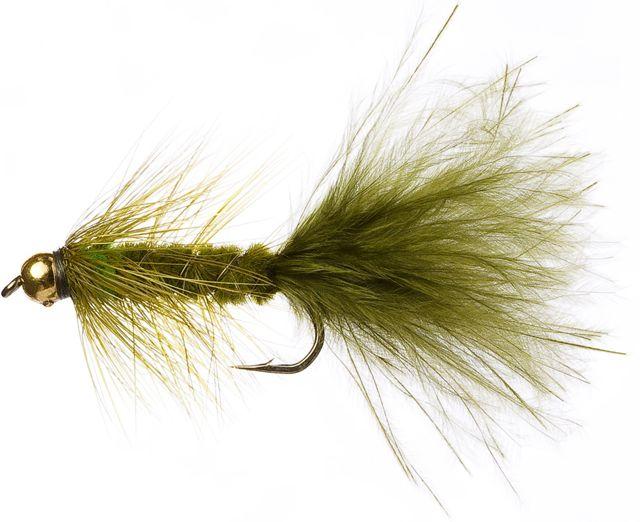
This fly is a deep running minnow imitation.  First time I fished a Clouser Deep Minnow was in a sheltered bay on Lake Diefenbaker, near Saskatchewan Landing.  It turned out to be a popular fly with the Goldeyes in the area.  I had good success with it a few years later at Besnard Lake, casting it past a Walleye pool then letting it swing down into the pool and pulling it through.  The barbel eyes make it sink quickly and the upturned hook help avoid bottom snags.

Tying the Clouser Deep Minnow

This is a very straight forward fly to tie.  If you can wind thread around a hook shank, you can tie this fly.  For variation, just substitute colors of bucktail to produce different colored minnow patterns.  Even tri-colored versions work, especially a green, blue, white combination.  Because there are two bunches of material used, one for the body/tail and one for the wing, you can even add a little bit of red to the body, such as red and blue, and then white and blue for the wing.

Difficulty Level: 1 out of 5.  According to the Fly Tying Bible this is a 3 out 5 for tying difficulty.  Once you figure out how to attach the dumbbell eyes, the rest of the fly is really easy.

Materials:

  • dry fly hooks, from #8 to #4 XL streamer hooks
  • blue and white bucktail
  • white thread
  • dumbbell eyes

Place the hook in the vice.  Starting just behind the eye, build up wraps of white thread approximately 1/4 down the shank.


clouser-minnow-1

Attach the dumbbell eyes to the top of the shank using figure 8 turns of thread.  Leave some space between the eyes and the hook eye.  You will use this space to attach the wing material.  Use enough turns to keep the eyes firmly in place.  Cut small bunches of blue bucktail and white bucktail and place them together.  The bucktail should be about 2 times the hook shaft length, or longer. Trim the end to make it even and place on the shaft behind the dumbbell eyes.  Secure in place by winding the thread in wide spaced turns to the hook bend and back, which will create a criss-crossed pattern of white thread.

clouser-minnow-2

Remove the hook from the vice, flip it over and re-insert into the vice. This places the heavy eyes at the bottom of the hook and keep the hook bend facing up when fishing to minimize bottom snags.

clouser-minnow-3

Gather a mixed bunch of white and blue bucktail, longer than the body/tail bunches, about 2-1/2 to 3 times the hook shaft length.  Catch them in between the hook eye and the dumbbell eyes.  Use enough wraps of thread to build up a head then move the thread behind the dumbbell eye and add another 8 to 10 wraps of thread.  Whip finish the thread here and add head cement to the wraps in front of and behind the dumbbells.

clouser-minnow-4

If your dumbbell eyes did not come pre-painted, you can choose to paint them or leave them.  If you wish to paint them, to add more realism, you can use a dab of whiteout, let it dry, then use a black sharpie permanent marker.  Small bottles of craft paint work as well, with a very small brush.  Just be careful you only pain the eyes. You can paint them before you tie them to a fly, but because they are small items, it can be difficult.

clouser-minnow-black-eyes

The Fly Box

With Wooley Buggers, Brown and White Bucktails (Mickey Finn), and Clouser Minnows.  These are all considered sub-surface patterns, fished as wet fly.  They are also fairly large fly patterns.  They are used to go down to where the fish are, feeding in the water column or the at bottom.  The next fly we will tie will be a dry fly, the Bivisible.

fly-box-3

7 Flies For Canada – #2 Brown & White Bucktail

March 28, 2016 / galen / Fly Fishing

Fly #2 in the Series

The bucktail fly is also known as the Mickey Finn. It is intended as a minnow imitation.  I have fished this fly successfully for perch.  They attack it aggressively with their tap-tap-tap bites.  A large size fly, such as a #4 or a #6 is often to big a fly for their small mouths so I like to tie them in #8 sizes as well.

Tying the Brown and White Bucktail

When I dug into my tying supplies, I found myself without the recommended materials for the wing portion of the fly, so, I adapted and used the closest materials I had.  In place of brown and white bucktail, I used long elk body hair and some white or red crystal flash.  Variations of this fly can easily be made by using other colors for the wing and tag sections.

Difficulty level: 3 out of 5.  According to the Fly Tying Bible this is a 3 out 5 for tying difficulty.  I agree with them, if only because of the variety of materials this fly uses.  a 3 out of 5, should mean that the average fly tier should be able to handle it, while a novice may struggle a bit.

Materials:

  • dry fly hooks, from #8 to #4 XL streamer hooks
  • red marabou or red crystal flash for the tag
  • red thread
  • black thread
  • silver tinsel or mylar piping
  • brown and white bucktail strands (I substituted elk hair and crystal flash)

Pinch off the barbs on all your hooks then secure the hook end of one in a vise.  Start the red tying thread about 1/3 back from the eye and wrap the shaft back to the hook bend.  Catch in a small portion of red marabou for the tag.

bucktail-fly-1

Cut a section of silver mylar piping about 2/3 the length of the shaft and remove any stuffing from the inside of the piping.  Slide the piping down the shaft and just past the red tying thread.  Use 5 to 8 wraps of thread to secure the piping in place, whip finish and add some head cement to the red thread.

bucktail-fly-4

Wind on the black tying thread at the eye.  Push the mylar piping in forward then hold in place.  Wind the black thread away from the eye to secure the piping in place.

bucktail-fly-2

brown-and-white-bucktail-fly

Mix together two small bunches of brown and white bucktail and stack one end together.  Place on the shank near the eye and secure in place with several wraps of black thread.  Trim away any excess bucktail reaching past the eye.  Wind on black thread to form a head, whip finish and add head cement to complete.

bucktail-fly-3

Options: You can add weight to the fly with lead wire, either by pre-wrapping the shaft or by attaching the wire at the same time as the piping at the hook bend, then wrapping the wire forward over the piping and securing with the black thread near the eye.  You can also trade the marabou tag for a thread tag made with multiple wraps of built up thread.

bucktail-fly-5

When tying a shorter shaft fly, the mylar piping can be difficult to work with in such short lengths.  Substitute some silver tinsel, using overlapping wraps from the hook bend to the black thread just behind the eye.

bucktail-fly-6

The Fly Box:

IMG_6528


7 Flies For Canada – #1 Bead Head Wooley Bugger

March 14, 2016 / galen / Fly Fishing

Fly #1 in the Series

Tying the Bead Head Wooley Bugger

Difficulty Level: 2 out of 5.
All of the steps are pretty basic, but if you decide to add your own enhancements and options it becomes a little more challenging. The most difficult step is winding the hackle, but get yourself some good hackle pliers and it will be an easy job.  According to the Fly Tying Bible (you need this book if you are even thinking of ever tying a fly) this is a 3 out 5 for tying difficulty.

Materials:

  • #4 Streamer Hook
  • Brass or Copper Bead Head
  • Lead Wire (optional)
  • Black Thread
  • Black/Olive Strung Marabou
  • Black/Olive Hackle
  • Black/Olive Chenille
  • Red Floss (optional)

Start by pinching down the barb on the hook with a set of pliers.

wolley-bugger-fly-2

Slide the bead head over the hook and forward to the eye of the hook

(Optional) Wind the Lead Wire from the bend of the hook forward to the eye.

wolley-bugger-fly-3

Wrap the thread approximately 5 times just behind the lead wire at the hook bend and catch in a bunch of marabou, stem of the hackle, and the Chenille.  Continue winding the thread forward to the eye, which also serves to secure the lead wire in place.

wolley-bugger-fly-4

Wrap the chenille forward to just short of the bead head and catch in place with several wraps of thread.

wolley-bugger-fly-5

Wind the hackle forward and catch in place with thread behind the bead head.  Tie off the thread and add head cement to finish the fly.

wolley-bugger-fly-6

Options: You can create variations of this fly very easily, just by changing the color scheme of the fly, substituting olive for black in any of the material, from all olive to all black, and a mix of colors in between.  On an all black version, create an egg-sucking leach by skipping the bead head and using red floss to build up a red, egg shaped portion just behind the hook eye.

wolley-bugger-fly-12

wolley-bugger-fly-14

The Fly Box:

IMG_6529

7 Flies That Catch Fish in Canada

March 11, 2016 / galen / Fishing, Fly Fishing

I recently read an article in Outdoor Canada Magazine (my second favorite outdoor magazine) titled 7 Easy to Tie Flies That Will Catch Fish Anywhere in Canada. I live “Anywhere in Canada” and I love to fly fish so I have decided that it is my mission this summer to try all these flies and give you a report on how well they work and how easy to tie they are. One of the points the author makes is “these flies will work just fine if they’re a little sloppy”. Coincidentally that’s exactly how I tie most of my flies. I think “sloppy” also makes them look “buggy”, and, in some cases, injured.

So, the 7 flies are (in order of the images below the list):

  • BEAD-HEAD WOOLLY BUGGER
  • BROWN & WHITE BUCKTAIL
  • CLOUSER DEEP MINNOW
  • BIVISIBLE
  • HARE’S EAR FLYMPH
  • X-CADDIS
  • EGG FLY

bead-head-wooley-buggerbrown-and-white-bucktail clouser-deep-minnowbivisiblex-caddishares-ear-nymphyellow-egg-fly

I have tied and fished flies similar to all these at some point, except maybe the BiVisible.  Good news, I can remember catching fish on all of them, from walleye and goldeneye on the Clouser Minnow to rainbow trout on the caddis.  The wooley bugger has been a favorite, catching a wide variety of species including pike, walleye, and rainbow trout.  The bucktail has work especially well on perch.  I haven’t used an egg fly pattern in Canada, but I have caught steelhead on the Salmon river in Idaho with an orange/red version.  Hare’s ear nymphs have caught rainbow trout and perch.

By the end of summer, I will also add a few of my favorites to the list, hopefully arriving at a respectable 10 flies that are easy to tie, easy to fish, and catch fish.  Expect that list to include the Super Jumbo Mosquito.

jumbo-mosquito-fly-12

Summer Fishing Plan

My plan for the summer is fill a new fly box with only these flies and fish them as often as I can.  Translation: I now have another reason to go fishing.  Whenever I convert my gear fishing fishing buddies over the art of fly fishing, I will arm them with a few of these flies and keep track of how well they do.  Well, 2 months until fishing season opens, I’d better get tying some flies.

new-fly-boxopen-fly-box

Essential Ice Fishing Gear

January 31, 2016 / galen / Fishing, Ice Fishing

Ice Fishing Essentials Gear List

  • 5 Gallon Bucket & Seat
  • Auger
  • Rod & Reels (x 3)
  • Hooks
  • Tackle Box Tray
  • Bait
  • Hole Cleaner

By essential ice fishing gear, we mean the minimum requirements to get out and enjoy a day on the frozen lake. This is not everything, and it’s not the high end of ice fishing gear. That’s another article.

3849063 To start with, and we try to list off the obvious items first, you need a 5 gallon bucket with a lid. The bucket is your tackle box and your seat.  If you are trying to take more gear than you can fit in a 5 gallon bucket, you are taking too much.  Inside the bucket should be your ice fishing rod and reel, your bait, and your single box of hooks and weights.  Add to this a hole cleaner (like a big perforated soup ladle) and you are stocked with the basics.  If you plan on keeping some of your catch, then you need to add a filet knife and some plastic storage bags.  Remember, it should all fit in the bucket.  The only things not likely to fit in the bucket are the rods and reels, but there is a solution to that.

I’m a big fan of The Fishin Hole so I’m going to feature some product pics available at their stores.

Once you get to your spot, you need an ice auger.  If we were trying to fish 3870721with primitive weapons I would say a hand crank auger, but when you have up to 4 feet of ice to drill through during a cold Saskatchewan winter, you NEED a power auger.  Generally there are 8″ diameter and 10″ diameter models available.  Don’t be cheap on your auger, get a quality 10″ auger.  If you are planning on drilling a dozen holes or so, you don’t want the auger to ruin your day.  Make sure you have the tank full of your oil/gas mixture before you leave so you don’t need to mess with that on the ice.


So you have a few holes drilled and you can set the auger aside for awhile.  Now make sure you have the least expensive item in your ice fishing tackle box / bucket ready to go, the hole cleaner.

3691010


Some people call it a skimmer, or an ice ladle.  No matter what you call it, when your holes start to freeze over, this $5 tool will make it easy to remove that thin top layer of ice from the hole.


The bucket, as was mentioned first, is your tackle box and your seat.  I recommend you buy a pivoting bucket seat cover to go with your bucket.  It gives a little bit of extra cushion for your butt and lets you move around easier.  You will want a lid that is easy on and easy off as you will be storing your tackle in it and you will need to go in and out of it frequently.  One custom modification you will want to make is to drill a hole in an outer flap on the lid and loop a zip tie through the bucket handle and the hole you drilled.  When you put your rods in the bucket, they will stick out the top too far to bend under the lid.  So let the lid dangle, but not get left behind.

Your choice in lures and bait is almost endless.  I have three favorites that I like to have pre-tied on three separate rod and reel combos.  When you are out on the ice, especially on a cold and windy day, tying knots can be difficult.  Have three rods rigged up will keep you fishing and able to adjust your lure and bait presentation quickly.

3868444 3844186  3870949


Above left is a Swimming Jig.  I used to use just a regular jig head, the same as when summer jigging over a walleye hole.  It was my go to lure.  Now I like the action of the swimming jig which seems to produce strikes a little better, especially with perch.  To add some flash to the presentation, the Whopper Hawger in the middle is easy to fish and with a single J hook is also quick to release the fish.  When I’m targeting walleye and pike, I like the Lindy Darter which also has a rattle feature to attract predators from further away.  For bait, check with your local tackle shop, but the standard meal worms for perch and minnows for pike and walleye will never go out of style.  Leaches may also work well but are hard to handle in the cold with gloves on .

3852441

I always multiple lures of each kind available, in varying weights and colors, just in case I feel the need to change up.  The need to change up is usually triggered by the guy next to you out fishing you 3 to 1 using an orange lure while you are using green.  Keep them in a tackle box utility tray, just one.  Don’t try to bring your whole tackle box with you, just bring the one tray, with just the essentials.  Less gear makes for less hassle out on the ice.


3877724

I mentioned before to have 3 rods rigged up and ready.  I like to  have rods rigged up for the lure/bait combination so that there is no waiting and no tying while on the ice.  Pick the rod, add the bait to the hook and drop it down the hole.  I am far less fussy about the rod and reel for ice fishing than I am for fly fishing.  You can get a good quality ice fishing rod and reel combo for $35 to $45 dollars.  At that price, get 2 or 3.  When you save yourself tying time in a -30 windchill, you will know.


So there are your Essentials for Ice Fishing Gear.  As I am writing this post, I keep finding myself wanting to drift into talking about some higher end ice fishing gear, some which is listed below.  That will be a future article.

Ice Fishing Advanced Gear List

When you go beyond the bare essentials, you quickly empty your wallet, but add to the experience.

  • Tip ups
  • Pop Up Shack or Shelter
  • Propane heater
  • Wood burning stove
  • Underwater camera
  • Snowmobile gear sled

Add Your Favorite Places

January 6, 2016 / galen / Fishing, Hunting

Do you have some favorite fishing or hunting places? We do, and we love to help out others around us by adding them to the Favorite Places section.

Our Favorite Places to Fish and Hunt

Adding one of your favorite places does not mean giving up your secret spot.  You don’t need to offer up your GPS waypoints.  Rather, you are helping other hunters and anglers be more successful in the outdoors, doing the same things you love to do.   If you are worried about your secret fishing spot, next to the secret inlet, just past the secret bush, then be a little more general, like “the west side of the lake”.

So take a minute or two, go to the link above, and add a few of your favorites.  You just might find that others are doing the same and this will help you broaden your hunting or fishing locations and you may discover a new favorite spot.

Sunset Trout – Advice on Trout Fishing

August 11, 2015 / galen / Fishing, Fly Fishing

Fly fishing for trout is a roller coaster experience.  When you find the right time and the right tackle, it’s pure adrenaline.  Acrobatic splashes, long runs, and a beautiful fish on the end of the line.  When the bite is off, the bite is off.  Trout tend to be very finicky, so if you find something that works, stick to it.  I have found the combination that has worked wonders for the past two weeks.

While fly fishing my favorite trout pond, I try to experiment and see what happens with a different pattern of fly, fished on the bottom, pulled just below the surface, fast and slow, drifting, changing colors and sizes of the same or different flies, and changing location of my casts.  While the old adage, “match the hatch” is certainly true, I’ve stumbled across a magic combination for catching trout at sunset in the middle of August.  The key to the whole matter may be the time of day, but here’s what’s worked for me.

I started fly fishing that evening at about 7:00 pm, casting and switching flies frequently, hoping to catch a few nice rainbows before it got dark.  There was a lot of action near the surface, but little for bugs on the top of the water.  My guess was they were feeding just below the surface.  So I changed tactics, tied on a dry and went for a fast retrieve just below.  The result, a few nibbles, even a couple of little ‘bows too small to really count as a fish.  So I changed flies, larger and smaller.  Retrieved faster and slower and deeper and left and right, and the same results, occasional nibbles.  The sun was quickly dropping behind the hill over my right shoulder, and the top water action was starting to die down.  Disappointed, I gathered in my line and began the short walk from the far end of the pond to where I had parked my truck.

It was 8:30 now and would soon be getting difficult to see.  In the 2 or 3 minutes it took to walk the length of the pond, the action suddenly increased, and the rises appeared larger than before!  I paused!  I thought! I took my rod back out of the case and cast my fly about 30 feet out.  Fish on!  A quick release and another cast.  Fish on!  That was two fish (and these could legitimately be called fish) in 1-1/2 minutes when I had caught next to nothing in the past 1-1/2 hours.  So I continued casting and catching, as the sun disappeared and I could no longer see my line, but I kept catching trout, and they seemed to be increasing with size as it got darker.  So I thought to myself, I’m staying here until I tangle or I lose my fly.  By the time I finally did tangle, it was 9:45 pm and the stars were shining bright.  I was the last to leave the pond that night.  Most others had left as the sun was setting and missed all the real activity.

Not sure if this was a one time phenomenon, I was determined to test my theory the next night as well, as all good scientists will do.  An experiment which can be replicated has no validity.  Therefore, in the interests of science (trout fishing research), I was duty bound to return, Tuesday, Thursday, the following Monday, Tuesday and again Thursday.  Each night, the results were the same.  A few nibbles, a few trout landed, then just after sunset, success every second or third cast.  My belief is that the trout were not so much going after a particular pattern of fly but more on the movement of the fly.  The first three nights I tried not to vary the experiment too much, sticking with a pheasant tail nymph each night and using a rapid retrieve just below the surface.  Most of the hits came within the first couple of pulls on the line, some the instant the fly hit the water.  I did move around the pond, trying shallow and deeper waters, close to and directly away from shore.  It didn’t seem to matter, the bite was on everywhere!

This past Monday I decided to try a different pond, one I know holds larger fish.  The results were very similar.  These last two days I varied the pattern, switching from the pheasant tail nymph to a zug bug to an imitation shrimp.  All three patterns about equal in size but varying in color.  It didn’t seem to matter.  All flies were equally successful.  I’ll be returning tomorrow night, well prepared, and experimenting again with a few different fly patterns.

Here’s my advice for fly fishing when the light is starting to diminish.  First of all, bring a small flash light.  The light will come in handy when you snag your cast, when you tangle your line, when you want to tie on a different fly, and especially when releasing a fish which has taken the fly deep in it’s mouth.  As always, it’s easier to release the fish with a barbless hook, or with the hook pinched down.  Shorten up your line.  You won’t need a lot of line, the fish are as active 10 feet off shore as they are 50 feet off shore.  A shorter line leaves less chance of tangling in the dark.  A side benefit of casting in the dark is you really learn to cast by feel and get into the rhythm of the cast.  The only senses you have are touch, taste, sound, and smell, and three of those don’t help much.

Outdoors Songs

July 28, 2015 / galen / Fishing, Hunting, Outdoors

Of all the topics in the world to write songs about, the great outdoors seems to have been mostly overlooked. It’s just plain difficult to find a song, let alone a good song, about hunting or fishing. Yes, there are a few “joke songs” out there, songs that rank up there with “Snoopy and the Red Baron”, and hunting or fishing show opening songs, but actual songs by actual brand name artists are hard to come by. It’s not hard to find songs about girls, songs about boys, songs about cars, and summer, and parties, and all other popular topics. So, we have scoured the internet and our own personal music libraries, to give you a list of songs for hunting and fishing. Some of these are great, some are crap (personal opinions), but you know what they are about by the titles. Some of my personal favorites come from Ted Nugent, who can quite regularly be found on outdoor shows having a great time shooting black bear in Saskatchewan with his “Wackmaster” bow or shooting ducks off his back porch in Michigan. If you want a great album, pick up “Spirit of the Wild” which includes many of the songs listed. A few of these songs take the light hearted approach, such as Brad Paisley’s “I’m Gonna Miss Her”. We have a second list of songs that might be considered, but aren’t really, about hunting or fishing, but mention animals, or lakes, or forest, or such.


  • Fred Bear – Ted Nugent
  • I Just Wanna Go Hunting – Ted Nugent
  • Gone Fishing – Downchild Blue Band
  • My Bow and Arrow – Ted Nugent
  • Spirit of the Wild – Ted Nugent
  • I Shoot Back – Ted Nugent
  • Tooth Fang and Claw – Ted Nugent
  • I’m Gonna Miss Her – Brad Paisley
  • Mossy Oak Song (Pass It On) – Tracy Byrd
  • One Damn Deer – from the Bob and Tom radio show
  • Mighty Manly Hunting Men – Da Yoopers
  • Thirty Point Buck – Da Yoopers
  • 2nd Week of Deer Camp (part 1) – Da Yoopers
  • 2nd Week of Deer Camp (part 2) – Da Yoopers
  • Deer Hunter’s Widow – Da Yoopers
  • Gone Fishing – Brad Paisley
  • Fish Fight Song – Da Yoopers
  • 40 Pound Crappie – Da Yoopers
  • Too Drunk To Fish – Ray Stevens
  • Fishing On T.V. – Brian Regan
  • Mama’s Got The Catfish Blues – Tom T. Hall
  • Hunting The Duck – Buddy Wasisname and The Other Fellers


The songs that didn’t quite make the list:

  • Take Me to the River – Al Green
  • Catfish Blues – Jimi Hendrix
  • Of Wolf and Man – Metallica
  • Sweet home Alabama – Lynyrd Skynyrd
  • The Trees – Rush
  • Bullfrog Blues – Dave Hole
  • The Spanish Archer – Deep Purple
  • The Hunter – Free
  • John the Fisherman – Primus
  • Barracuda – Heart
  • Great White Buffalo – Ted Nugent
  • Hibernation – Ted Nugent


Man vs Mosquito

July 14, 2015 / galen / Fishing, Fly Fishing

Today I attempted to fish at the North American mosquito testing grounds. I pulled up and parked near one of my favorite fishing spots and opened the door to get out. Within 2 seconds I had two mosquitoes on my ear. Like a fight in a high school parking lot, it was on! Out came the Muskol. I was determined to not let a pesky little insect prevent me from casting my fly rod and hooking some trout, maybe that big brown I’ve seen feeding on the surface nearby. In fact, mosquitoes be damned, I will use them to my advantage.

I defiantly walked to the waters edge and tied on my “Jumbo Mosquito” pattern and started casting, through a cloud of mosquitoes, so it seemed. Every piece of exposed skin was covered, twice, with bug repellant, but they were all over me. I set my rod down and started applying bug repellant directly onto my clothes. I read the label, “Apply sparingly, re-apply as needed, lasts up to 6 hours”. Try 6 minutes and only when applied in thick layers. It was better to be on the move. With myself and my dog constantly moving and casting, I thought I could move away from the swarm, only to realize I was moving into the next swarm. Walking through the grass only bounced more mosquitoes into the air.

I was convinced I was in a battle with Muskol resistant mosquitoes, or these are the mosquitoes from the bad side of town and they treat Muskol like candy or a cheap drug. The more I put on, the more I was swatting at mosquitoes landing on my neck, arms, legs. Finally after an hour and a half, and no fish, I packed it in and headed home. I saw the big brown trout surface again. I’ll be back for him, with uber strength bug repellant. Perhaps a double layer of Muskol Extra Heavy Duty and Deeper Than Deep Woods Off.

This round to the mosquitoes. Next round to man!

Your Rod as a Fish Ruler

July 3, 2015 / galen / Fly Fishing

When you are busy fishing, you have a hand full of rod, reel and line, and hopefully a net in the other, ready to land your latest catch. Once you remove the hook, do you have time to fumble through your vest for a ruler to measure the fish, getting it back to the water quickly? What if your rod was also your ruler?

I have 3 fly rods, an 8 weight I use for pike, a 6 weight for river fishing, and a 4 weight for trout ponds and perch. Recently I was fishing a trout pond and tied into a decent fish for the pond, about 12 inches, but not exactly sure.  I laid the fish down beside my 4 weight rod and reel for a quick photo then slipped the fish back into the water.

JulyRainbowTrout1

It looks like about 12 inches.  A few years ago, I had used thin strips of duct tape wrapped around the shaft of my 6 weight rod to mark off ruler lengths of 12 inches and then every 3 inches.  When I took the above picture, I realized my 4 weight rod doesn’t have the ruler markings, so I used some colored electrical tape and added the measurements to my 4 weight, my 8 weight, and redid the markings on my 6 weight.

RodsAsRulers4

Some might say the color tape makes the rods look a little ugly, but I don’t mind, and the quick ruler is a time saver on the water.  I don’t bother with longer measurements on the 4 weight, I have it marked at 12″, 15″, and 18″.  I don’t expect to catch anything bigger than that with that rod.  The 6 weight goes up to 27″ which would be one hell of a trout.  The 8 weight is marked from 12″ all the way up to 48″, because I’m an optimist.

RodsAsRulers5

«‹34567›»

Recent Posts

  • First Fishing Trip of the Season
  • A Lesson in Remote Boat Repairs – Bring Extra Parts
  • A Sea-Doo Makes a Terrible Kayak
  • Putting Out the Dock and Lift – High Water
  • Spring Time is Work Time

Categories

  • Bear Hunting
  • Camping
  • Deer Hunting
  • Duck Hunting
  • Fishing
  • Fly Fishing
  • Goose Hunting
  • Hunting
  • Ice Fishing
  • Life at the Cabin
  • Outdoors
  • Snowmobiling
  • Uncategorized

Subscribe to Updates

Subscribe to our Posts